Once you have a set of search results in the Results List, there are many tools that you can use to work with these results. You can change the way the results are displayed and show them as a table, or move the whole panel to the bottom of the map, or select some of the items and put them into a separate list to deal with later.
The list of search results is just the beginning. Each item in the Results List can be used to find out more information about that feature and its attributes.
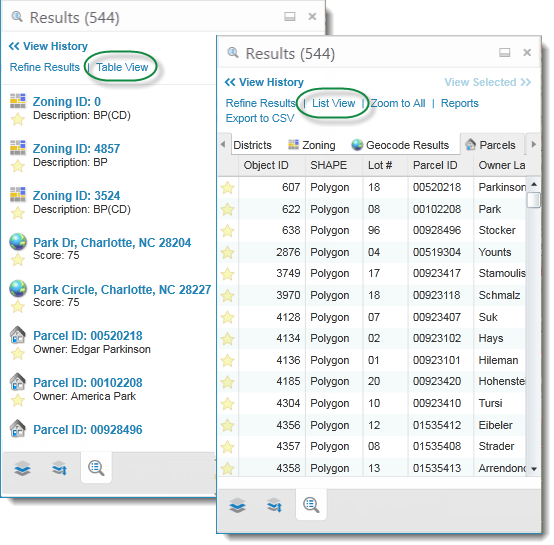
You can display the items in the Results List in two Views:

Toggle between Table View and List View in the Results List
You can use the Results List in the following ways:
To find a feature's attributes, select the feature in the Results List.
The window displays a list of details and attributes about the feature, with links to more information.
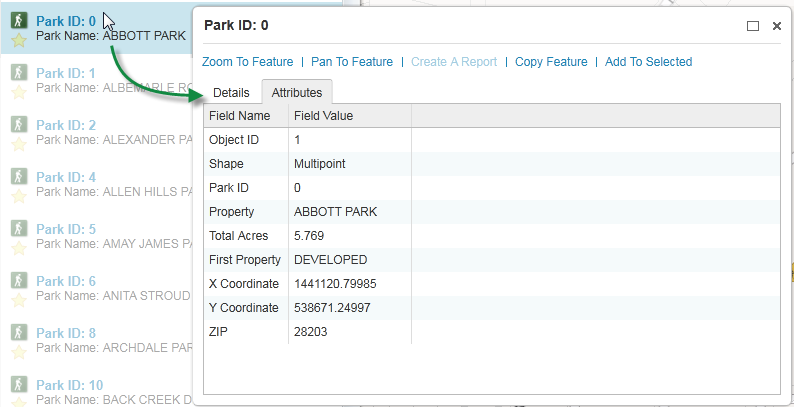
Feature attributes of an item in the Results List
To display a menu with shortcuts to common tasks, right-click a feature in the Results List.
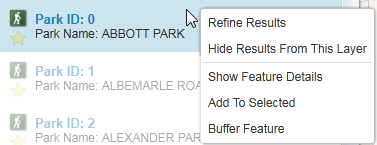
Right-click to show the Feature Action Menu
To display the results in a table, click Table View.
In Table View, all the results from a particular layer are grouped on a tab with their icon and a label. The Table View displays both the feature name and attributes so that you can compare features.
When you click on a feature in Table View, the map zooms to that feature on the map.
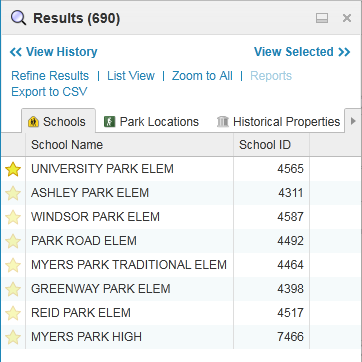
Results shown in Table View with tabs for each layer
To export the results of your search to a CSV-formatted file (spreadsheet), click Export to CSV.
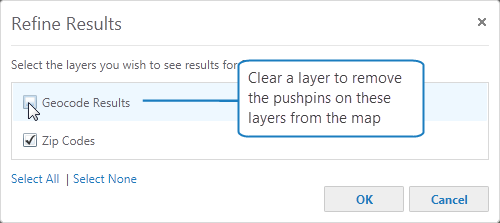
To narrow your search results, click Refine Results and uncheck any layers you want to exclude from the Results List.
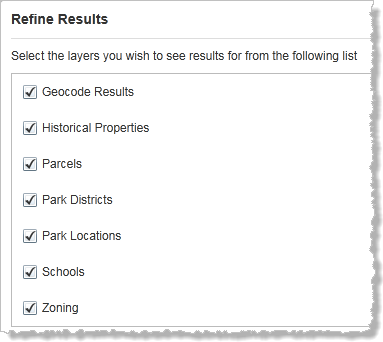
Refine Results dialog box listing layers to uncheck
To create a report of these search results, click Reports on the toolbar.
When you click Reports, a third icon is added to the Toolbar at the bottom of the Information Panel. ![]()
To change the position of the Results List to below the map, click the Wide icon at the top of the Information Panel.
![]()
Click the Wide icon to reposition the Results List below the map
If you have pushpins enabled on your map, they appear over the center of features that are currently listed in the Results List. For example, if you search for 910, when the features are listed, a pushpin appears over each feature on the map from any layer that begins with or contains the characters "910".
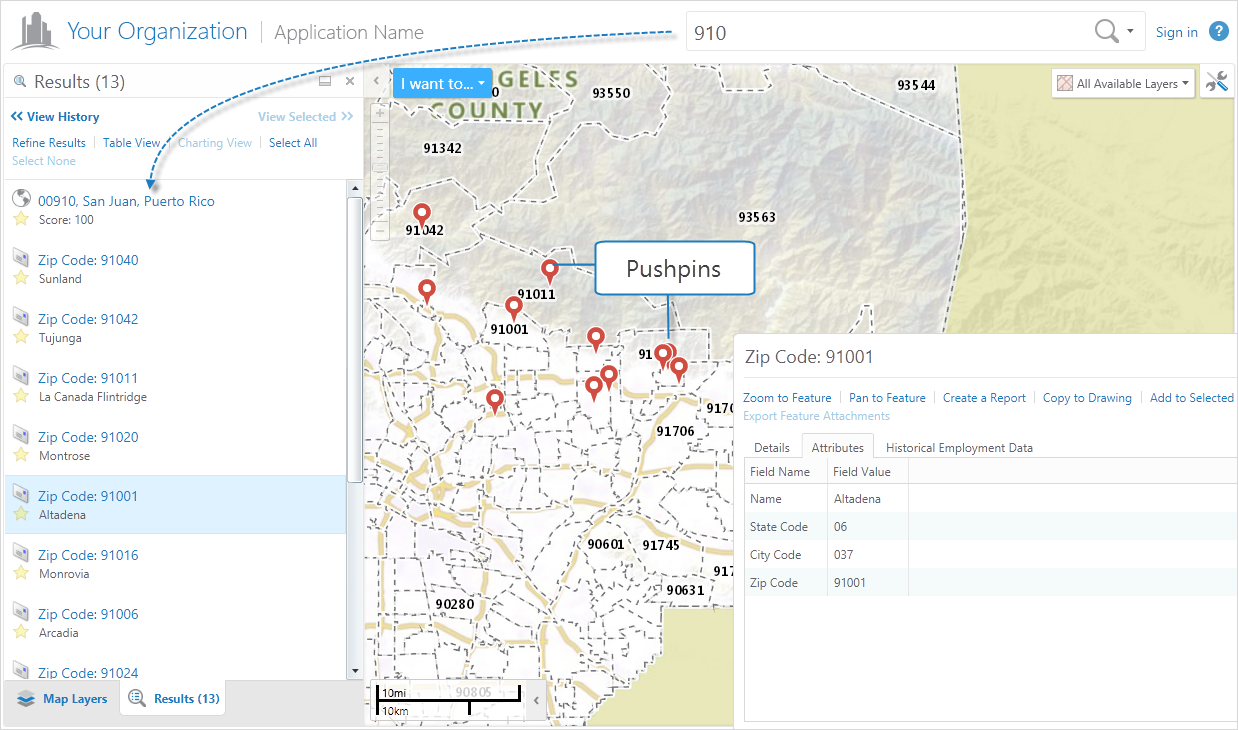
You can interact with pushpins in the following ways:
To highlight a feature on the map, click the feature in the Results List. The map zooms to that feature, hightlights it and displays a Map Tip with links to more information about that feature.
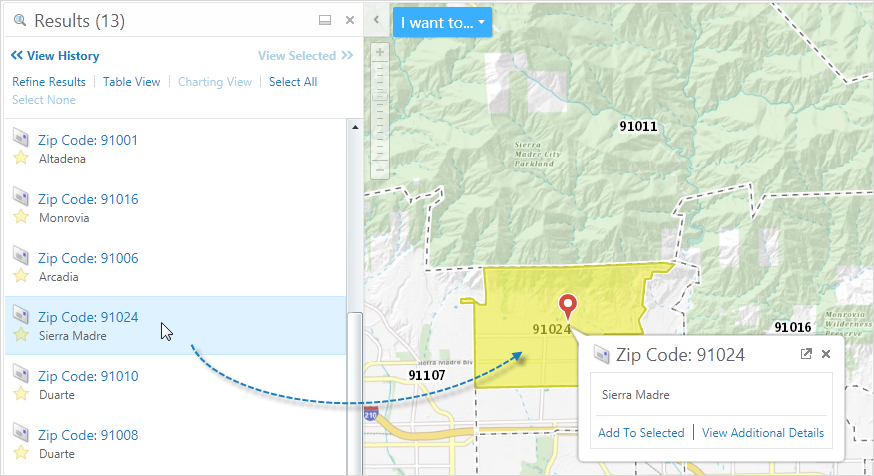
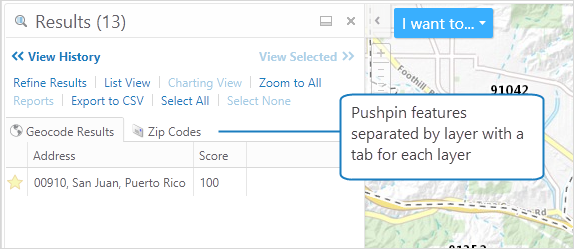
To separate pushpin results by layer, click Table View in the Information Panel. The pushpin results are separated into a tab for each layer. You can then click a layer to see only the pushpins for that layer.
To refine the results listed and reduce the number of pushpins, click Refine Results in the Information Panel. In the Refine Results box, clear any layer to remove those results from the Results List. All the pushpins on that layer are also removed from the map.
